Difference between revisions of "Beginners Guide"
m (removed duplicate picture) Tag: visualeditor |
m (correct minor typos) Tag: visualeditor |
||
| Line 45: | Line 45: | ||
[[File:ASL node number settings .png|none|thumb|1249x1249px]] | [[File:ASL node number settings .png|none|thumb|1249x1249px]] | ||
| − | Your new node number and | + | Your new node number and its password will be on this page. Write them down as you will use them to configure your AllStarLink system. |
You may also change the settings associated with your node. | You may also change the settings associated with your node. | ||
| Line 51: | Line 51: | ||
[[File:ASL node settings editor.png|none|thumb|948x948px]] | [[File:ASL node settings editor.png|none|thumb|948x948px]] | ||
| − | Consult | + | Consult your owners manual or your favorite internet search engine for how to install an image for your computer system. |
Install the AllStarLink disk image to your computer. Insert the appropriate media for your system and boot the computer. | Install the AllStarLink disk image to your computer. Insert the appropriate media for your system and boot the computer. | ||
Revision as of 02:56, 18 January 2019
AllStarLink for beginners.
The first step is to create an account.
Go to https://allstarlink.org/ and click the sign up link.
While you are awaiting the verification of your account (usually within 24 hours) you may download one of the image files for you computer system you will use to run your AllStarLink node.
Go to https://wiki.allstarlink.org scroll down to the Downloads section and select the appropriate image for the type of system you will use.
Write the image file to media. Either a USB memory stick, CD or DVD, or a microSD card (Raspberry Pi).
Next you will need to login to your account at https://allstarlink.org/
Click on Login/Signup as shown in the image above.
You will need to create a "server" : Click on <portal> then <server settings> from that page
Click on <Add a new server>
Please take the time to read the instructions on each page.
Then click <Proceed with Server Setup> if needed.
Fill in all of the information and click <submit> at the bottom of the page.
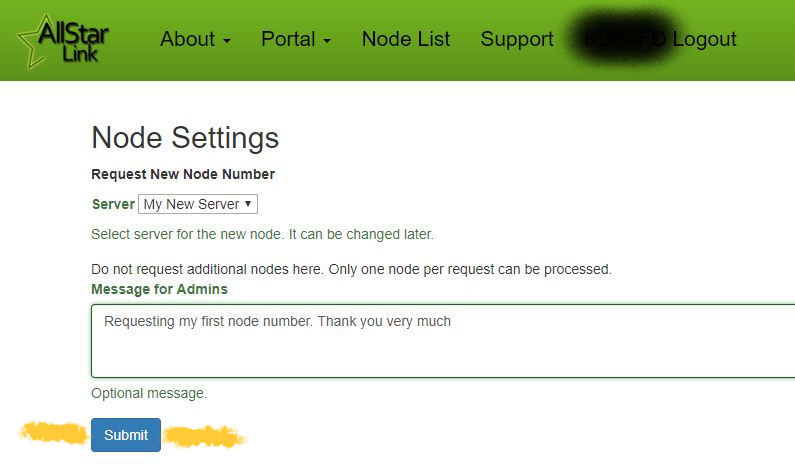
At the top of the page, click <portal> <node settings> then <Request a new node number>
select which server you would wish to have a node number assigned to
if you need more than one node number for the same server, repeat the process
a comment of 'addional node on same server' would be appropriate
Once your node number request(s) are processed you will receive an email.
Log into your account on https://allstarlink.org/
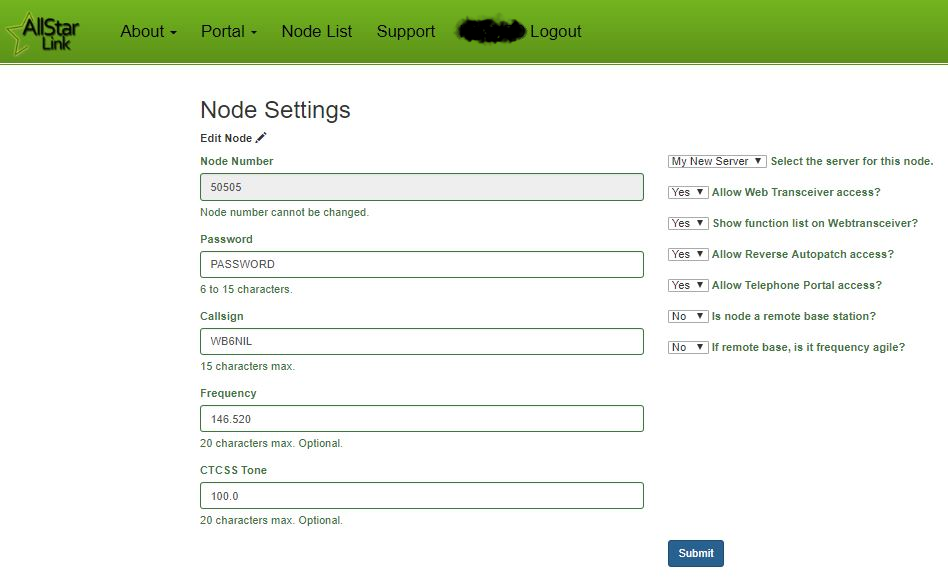
Click <portal> <node settings> and then select which node you wish to view/edit.
Your new node number and its password will be on this page. Write them down as you will use them to configure your AllStarLink system.
You may also change the settings associated with your node.
Consult your owners manual or your favorite internet search engine for how to install an image for your computer system.
Install the AllStarLink disk image to your computer. Insert the appropriate media for your system and boot the computer.
When the login prompt appears enter the user ID of repeater and press <enter>
Enter the default password of allstarlink
Follow the on screen instructions for the initial password change.
For users familiar with the linux operation system you may proceed to edit the system manually.
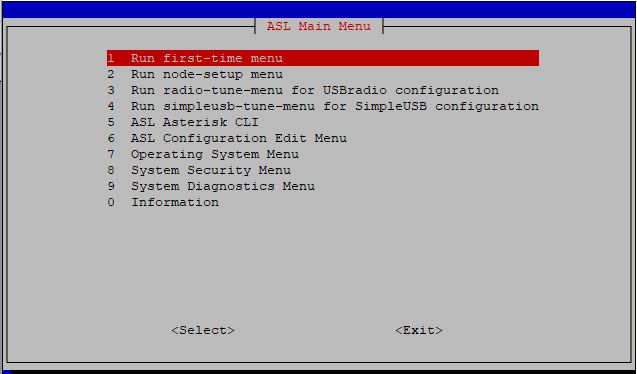
For users not familiar with linux and ASL, at the Linux CLI (command line interface)
Type sudo asl-menu as the example below shows.
repeater@repeater:~$ sudo asl-menu
This will load the AllStarLink configuration menu.


